

Dreaming of adding a high-quality Spanish shed to your property? These design tips + BEFORE and AFTER photos prove you don’t have to start from scratch!
A lot goes in to planning a custom Spanish shed for any given property. I know, because I have been designing Spanish sheds since the early 2000’s.
Most of my Spanish shed design proposals begin with original design rendering(s). I like to draw in every detail so my clients can see what could be. Subsequent discussions then usually advance to the specific location for their shed, and what materials, finishes and building techniques will be used to build it.
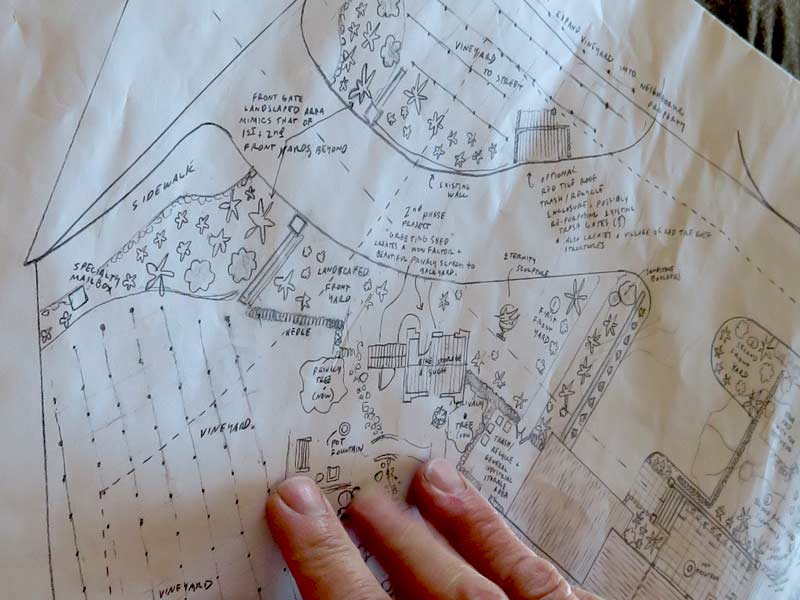
This particular client had asked me to develop a landscape plan for their entire property. I presented these ideas on November 30, 2021. In this top corner of the lot, I proposed a custom Spanish shed that would become a focal point (and privacy buffer from the street). Something that will be experienced upon entering the main gate.
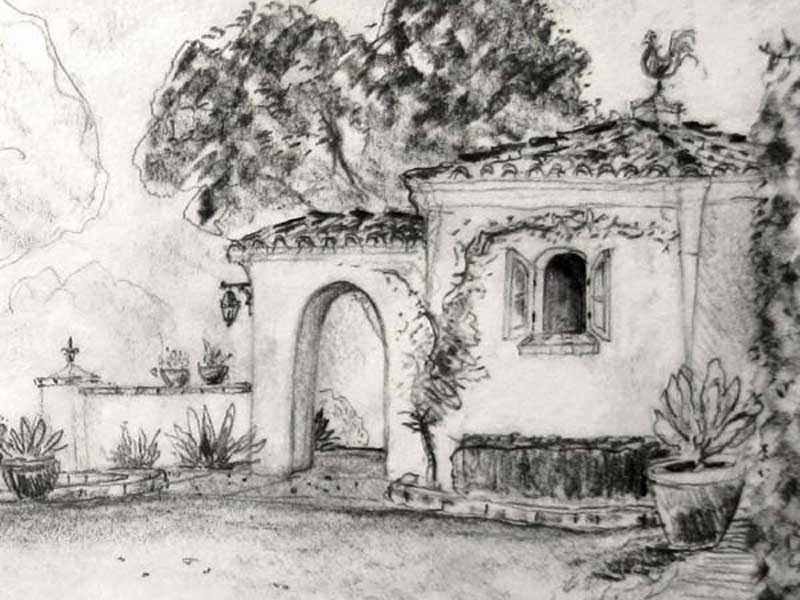
I envisioned the shed to have a single door and a couple of charming, deeply recessed windows. Attached to the shed would be a thick, arched passageway with red tile roof built above it. Very similar to this Spanish shed I designed for a client in Montecito back in 2011 (ABOVE).
Having worked with this client on and off for nearly two years developing custom elements to the interior and exterior of the main home, this shed structure was a bit much to take on at that moment in time.
SO, WE PIVOTED, as I proposed Plan B!
Listen to Jeff Doubét Share More
Hear about the thinking process, and roundabout way this stunning Spanish shed was created in beautiful Santa Barbara, CA.
CLICK [+] to Read Transcript & Translate
“Hey guys, I thought it would be fun to continue my Spanish Shed Collection series. This is number three… more to follow. I thought this one would be good because it was done on somewhat of a budget.
The owners had plenty of money, but they had “project fatigue”- we had been kind of working on the exterior and the interior of the house for almost 2 years.
Initially, I had a custom shed design (planned), so once you enter the property through gates, you come down the driveway and there’s a cute little guard shack type shed. More elaborate than this, but just kind of a cool little jewel box sitting there.
But again, just project fatigue. What, we still need this storage… what could we do that would be attractive? The hillside that they own didn’t have a whole lot of places to put a shed, so we had to make sure that it looked great.
A little bit of rogue thinking… I had some experience with taking regular store-bought sheds, big box store type sheds and cladding them with high-quality materials like authentic plaster, authentic red tile roofs, and that sort of thing.
Quick Disclaimer here – I’m not telling you how to build it. In fact, this voided the warranty the second that we took a stock shed and started making modifications.
And we had on-site meetings with the owner and the contractor. The contractor is well versed in seismic upgrades to houses and all that kind of stuff.
So, we did beef up the roof rafters and added hurricane straps and a bunch of other things… which again, I’m not structurally telling you how to do any of this. This is a website for inspiration and… beauty, actually. And so, I just wanted to share with you the steps that we took.
And you can scroll through all the images, the before pictures… the after pictures. (See) how you can clad a basic shed with high-end materials, and then surround it with gorgeous landscaping.
The homeowner had a wonderful landscaping team come in and ultimately design in and around the shed.
I had some initial thoughts, which I’ll share the drawing below.
But I hope you can enjoy the process, and imagine what you could do with your own property!”—Jeff Doubét, February 20, 2026
Spanish Shed Before and After Photos
With the landscape plan and a couple of rough sketches, our initial design meetings went well. But as mentioned- the elaborate, custom built Spanish shed proposal needed to be revised.
Read more
That can happen with extensive home remodels. Project fatigue is thing. But the homeowners still wanted to create a special Spanish storage shed.
Plan B entailed a rogue design idea. An unconventional process of taking a standard 10 x 12 shed, and adding high quality materials to it.
*It was actually back in 2012 when I imagined this idea for the first time. My wife Lori and I risked our own money to prove that my ideas would work. The first one did, and we ended up custom designing multiple sheds this way. Those early successful projects gave me the confidence to go on and consult with clients on how to do it on their properties.
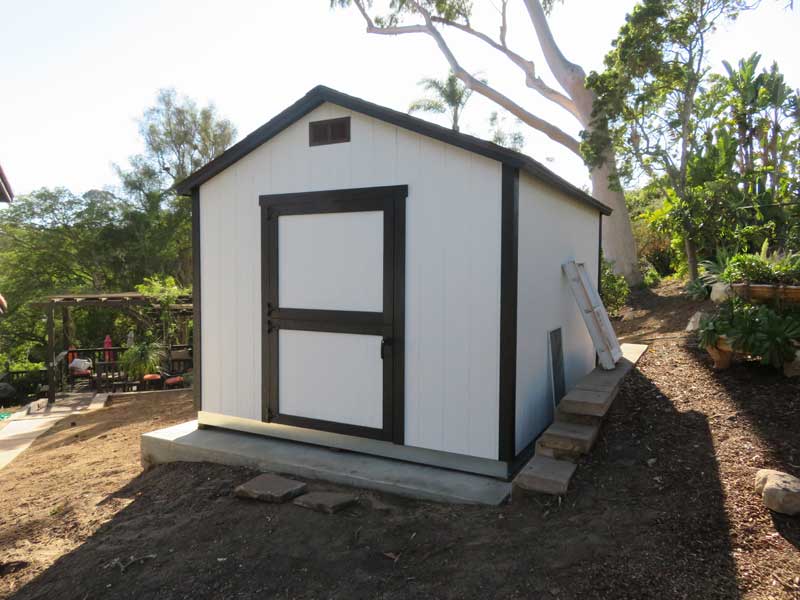
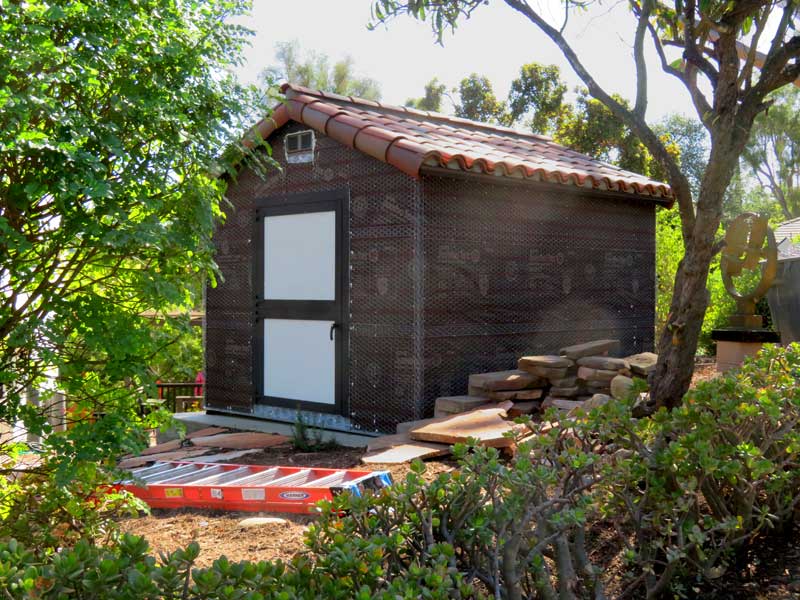
BEFORE PHOTO (ABOVE): February 17, 2022 – A standard 10′ x 12′ shed was purchased and installed by a local shed supplier. Because this shed was being placed on a gentle slope, the homeowner and their contractor poured a concrete slab “pad” before the shed arrived.
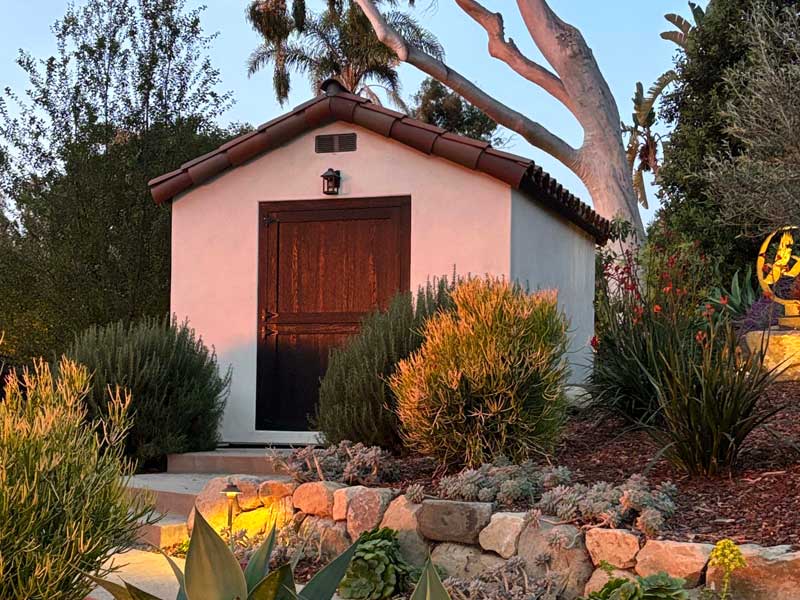
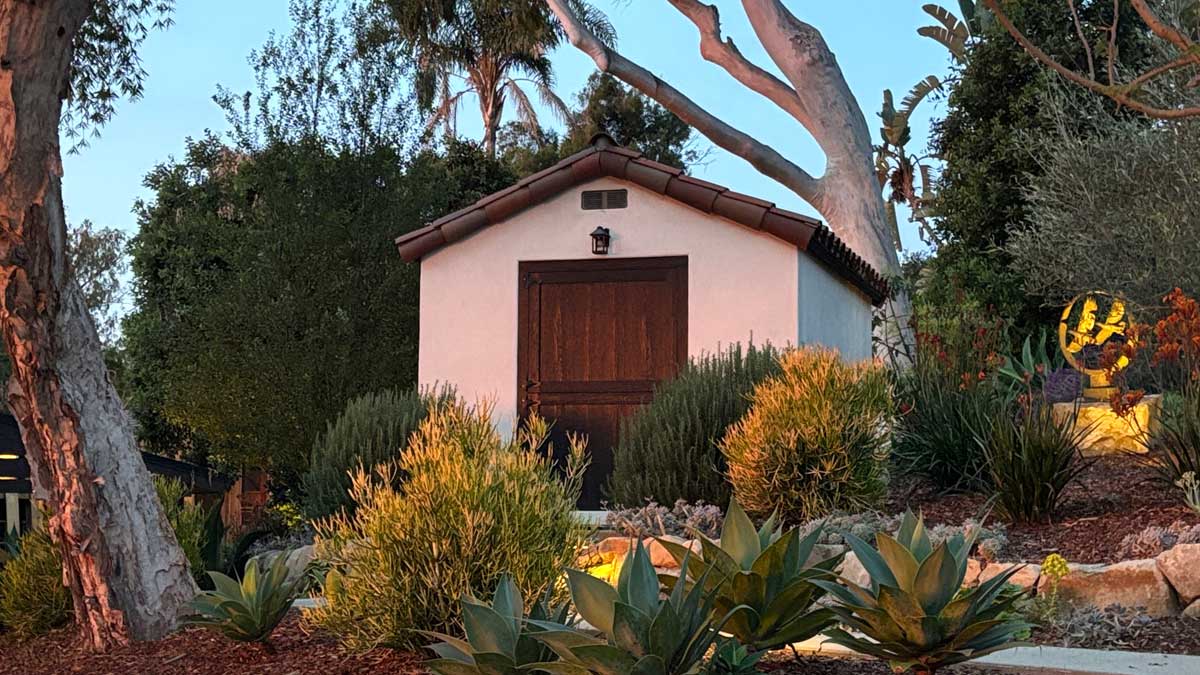
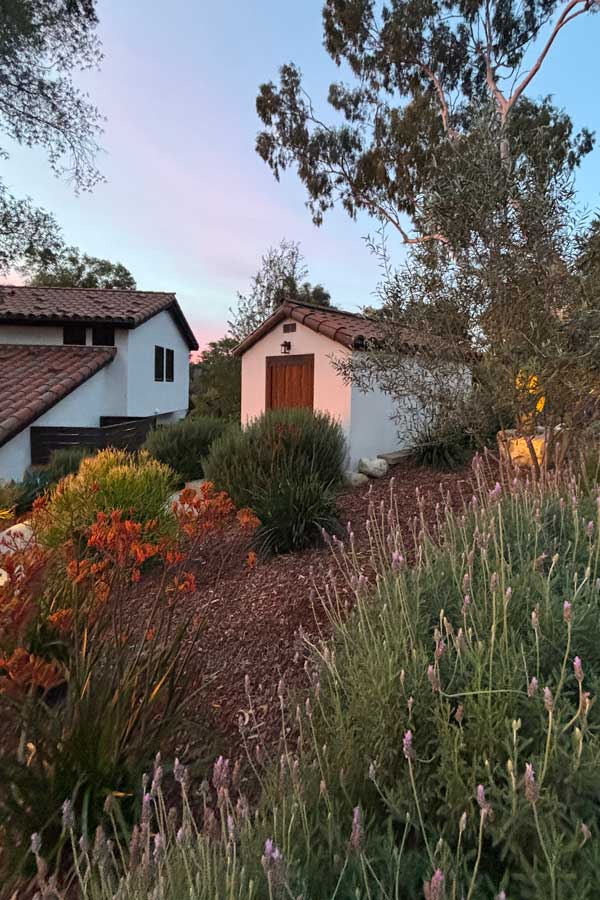
AFTER PHOTO (ABOVE): February 9, 2026 – The standard, “big box retailer” shed after it was transformed by our team collaborations to customize it.
A top landscaping team created the stunning landscape work. As it has has matured, it has added a tremendous amount to the overall high-end look of this Spanish shed.

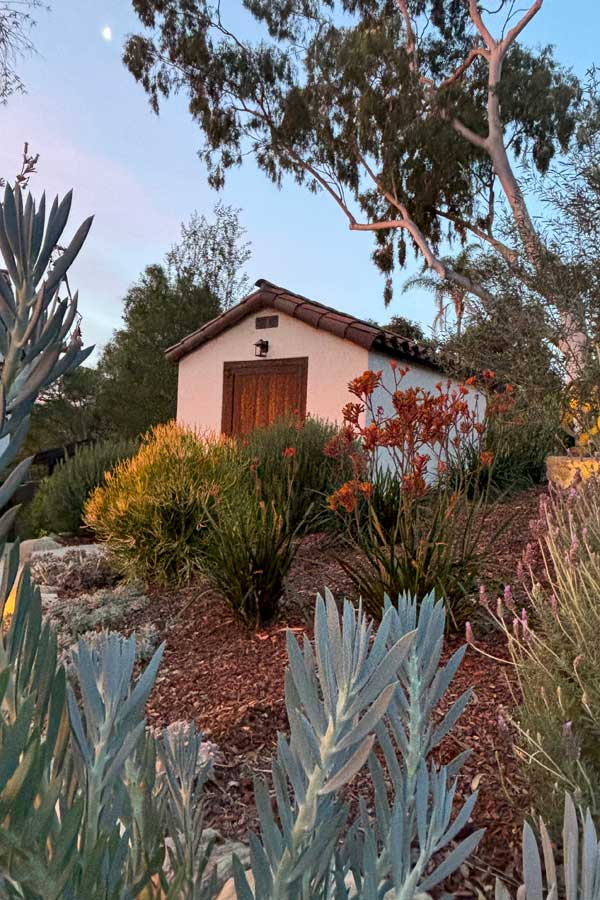
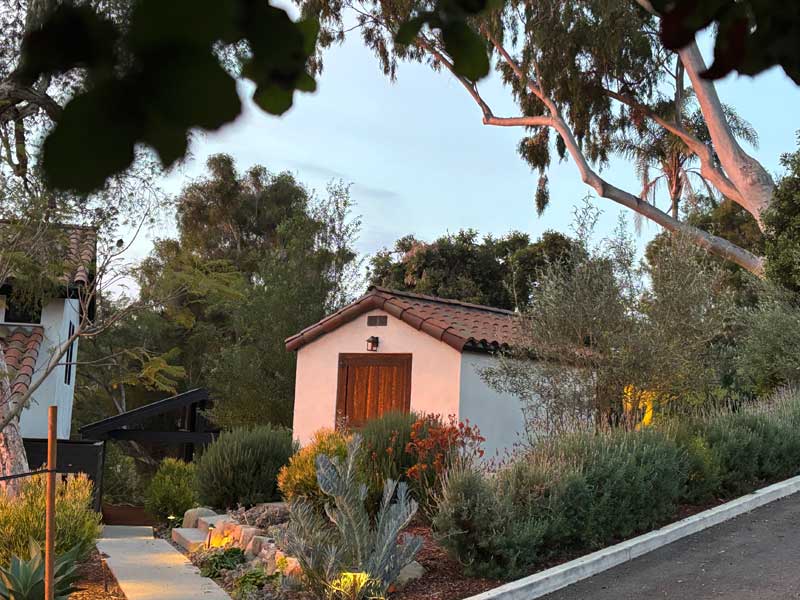
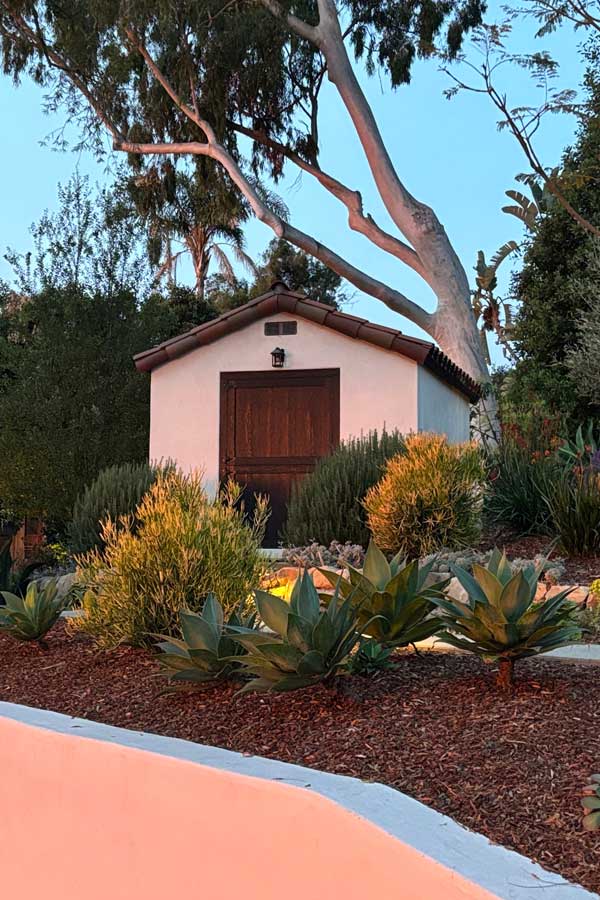
AFTER PHOTO: Another perspective of the customized Spanish-style shed, installed not too far from the main house.
Please Note: This article is for Inspirational Use Only- Consult with your team (architect, contractor and building department) for specific details for how to proceed with your specific shed project and plans. Important: Modifications to a stock shed will immediately void the warranty. My full disclaimer, HERE.
Site Planning for a High Quality Spanish Shed
Many of the custom Spanish sheds I have been involved with start with a blank slate. This one was no different. Scroll to follow along as I share various progress photos, and teach you how this project was created.
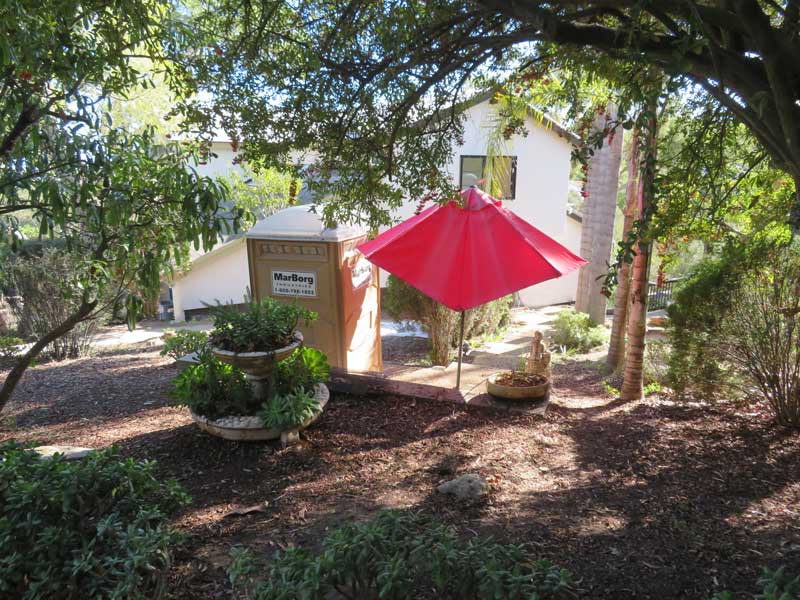
First, I have to start with this glam shot. The Marborg port-a-potty has been delivered to the site. The combination with an old patio umbrella was the perfect makeshift “mock up”. It proved how the new soon-to-be shed would provide charm and additional privacy for the property.
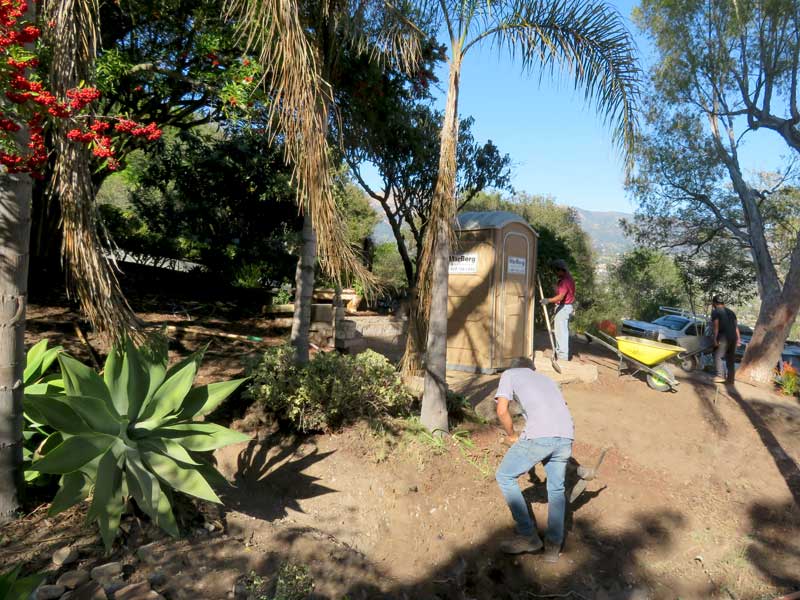
On February 9, 2022 the landscape crew began clearing the property. Here they are getting ready for the new shed, along with the Santa Barbara sandstone garden walls and beautiful drought tolerant Spanish landscape they will install.
a High Quality Spanish Shed with Humble Beginnings
Sometimes the coolest Spanish shed projects start with humble beginnings. Whether starting completely from scratch and stick framing a custom shed from the ground up– or purchasing a boring, stock, store bought shed (BELOW).
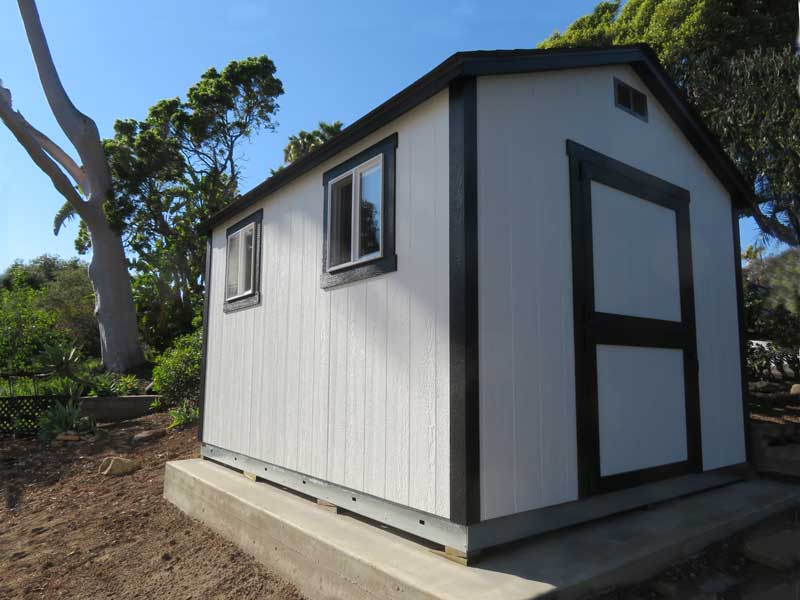
This physical project all started when the homeowner ordered a bare bones 10′ x 12′ stock shed. On February 17, 2022, it was delivered and installed on the site . *Cement slab not included
Learn More…
After all the years I have been designing Spanish sheds, I have determined that a cement slab is the ideal platform for a custom Spanish shed. A concrete foundation will add quite a bit of cost to your shed, but it will be your guarantee for keeping unwanted guests from living under it.
I have successfully customized “stock sheds” having them placed over well planned and level section of ground. I always prep the ground with 6 inches of compacted road base and extend it 6″ beyond the actual width and length of the shed itself. In other words, a 10′ x 12′ shed would have a level road base “pad” measuring 11′ x 13′).
But sadly, (eventually) skunks, possums, racoons, rabbits and squirrels will figure out there is a secure and dry place to live under the shed and take turns digging an entrance underneath the shed, regardless of the struggle to dig through the road base.
If I ever go this mostly successful route again, I would lay a couple of layers of chicken wire in the 11′ x 13′ x 6″ deep hole before compacting the road base that will be placed in it.
This all described… if a slab is poured and the stock shed placed on top of it, you will have a 99% vermin-proof structure if you take one last step. Gluing heavy screen over the ventilation holes in the steel foundation. This will keep mice and lizards out (from entering those tiny holes)
Tips for Installing a Red Tile Roof on a Shed
Much of the stock shed construction was retained, including the charcoal black asphalt shingles. The shingles would provide waterproofing for the new clay roof.
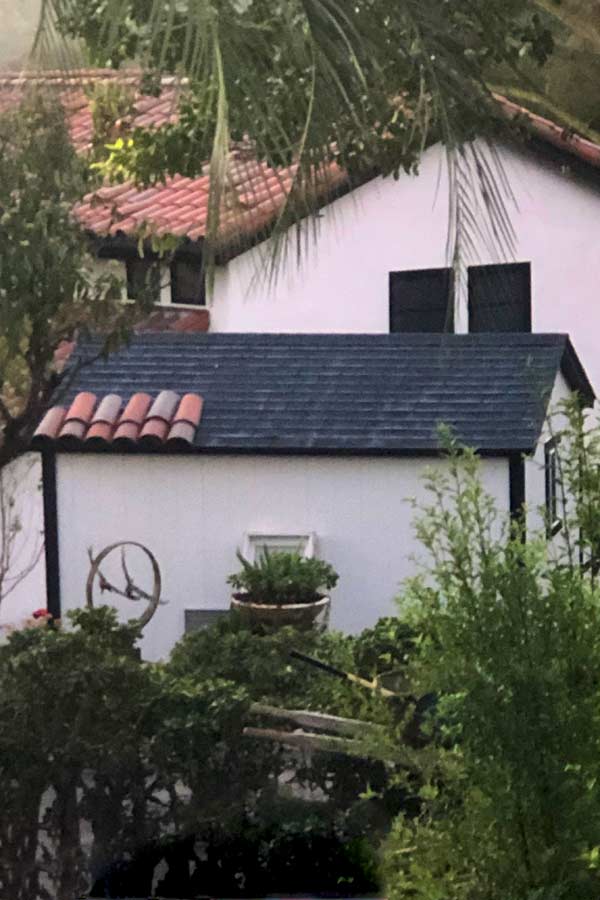
BEFORE PHOTO (ABOVE): On February 17, 2022 a mock-up of the Spanish clay roof tiles was placed over the top of the asphalt shingles of the stock shed.
Once completed, the new Spanish roof will coordinate with the main house roof (seen in the background).
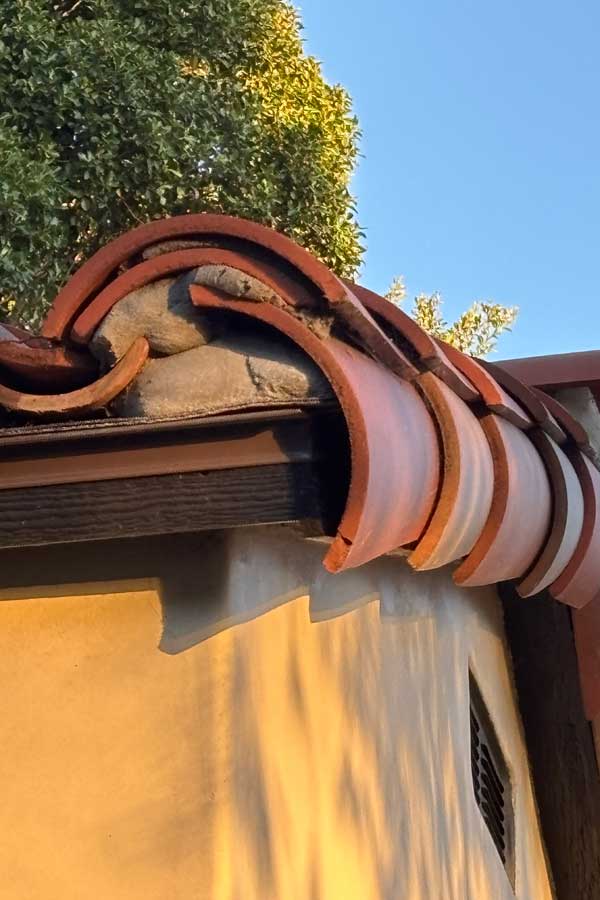
AFTER PHOTO (ABOVE): A close up of the stunning details of the modified Spanish shed roof tiles, after installation.
NOTE: Inside this stock shed, the roof rafters were “beefed up” to carry the extra weight of the red clay roof tiles being added. The general contractor for the main house renovations is well versed in structural and earthquake upgrades and was able to accomplish this easy upgrade.
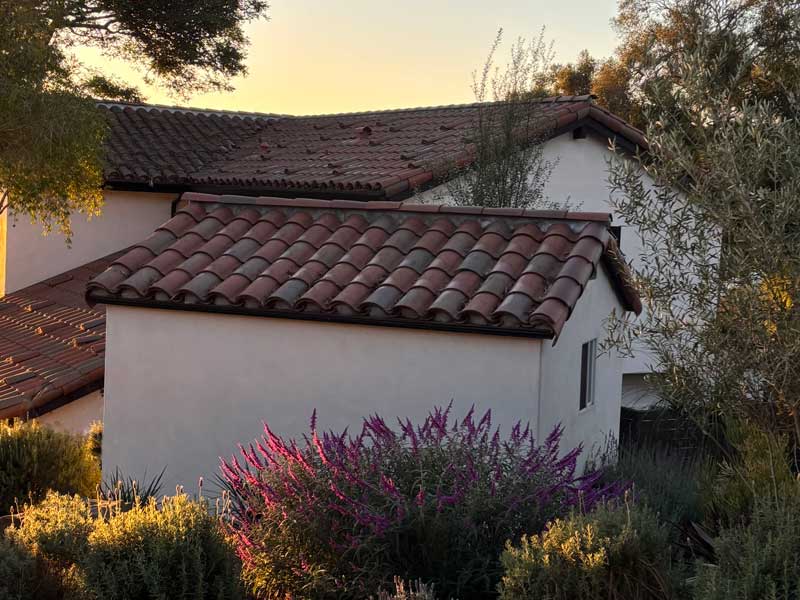
AFTER PHOTO: This is the finished shed, once the S-Tile red clay roof was installed.
Stucco Info for Creating a High Quality Spanish Shed
To achieve a classic Santa Barbara Spanish stucco finish on the exterior of this shed, the first modification was to remove all of the factory wood trim at the windows and each corner.
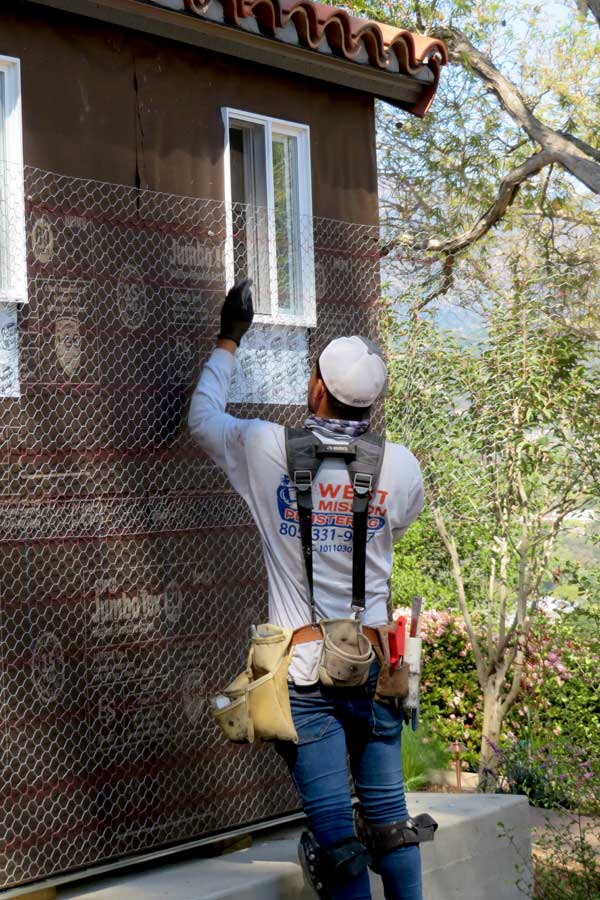
Once that was completed, a talented stucco expert installs weatherproofing paper and galvanized woven wire stucco netting right over the top of the existing wood exterior paneling.
March 16, 2022: the stucco team continues stucco net installation. In this image you can see the original (white) wood siding of the shed being covered by weatherproofing and wire netting.
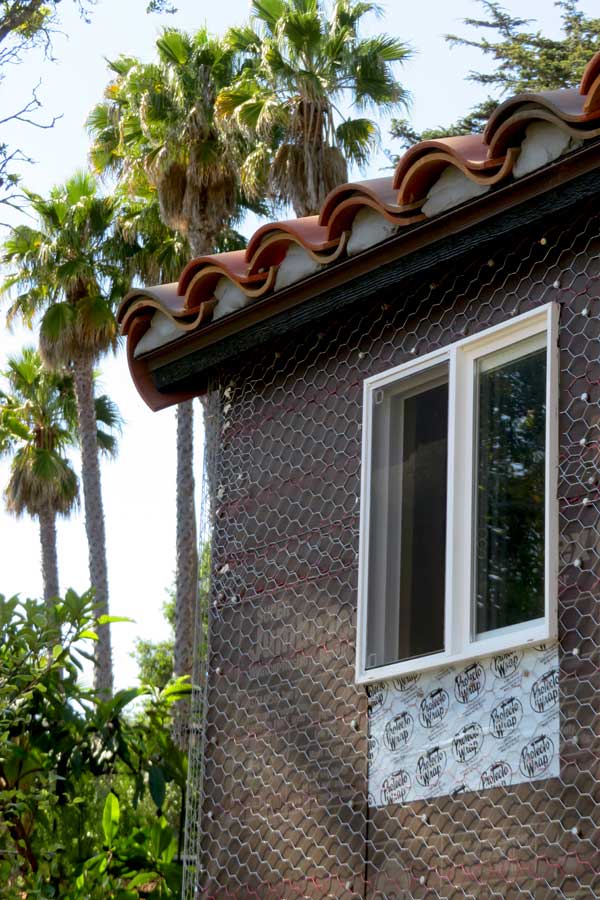
Here is a close up of the completed weatherproofing of the shed. Protecto Wrap is used to weatherproof around all window, door and vent openings. You can purchase directly on Amazon.
*As an Amazon Associate, I earn on qualifying purchases.
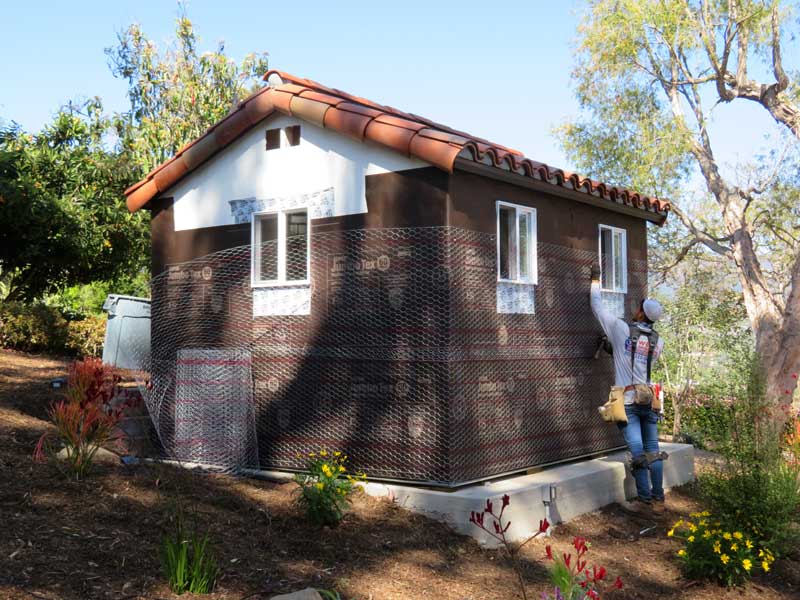
By March 18, 2022 the weatherproofing, stucco netting and metal corners were completed. The shed is now ready for the first coat of stucco!
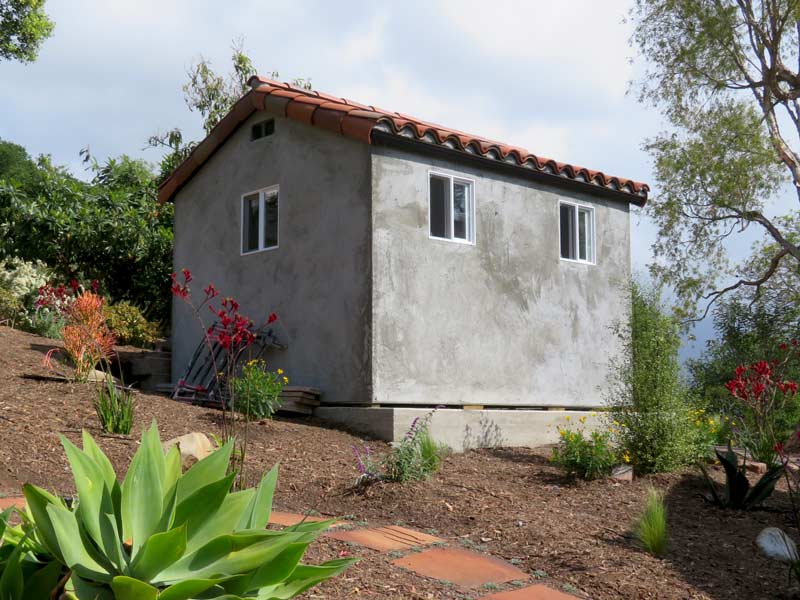
This March 31, 2022 progress photo shows you the application of the second coat (brown coat) of plaster after it has been applied. It’s starting to really look like a substantial building, even though it is a modest 10′ x 12′ storage shed.
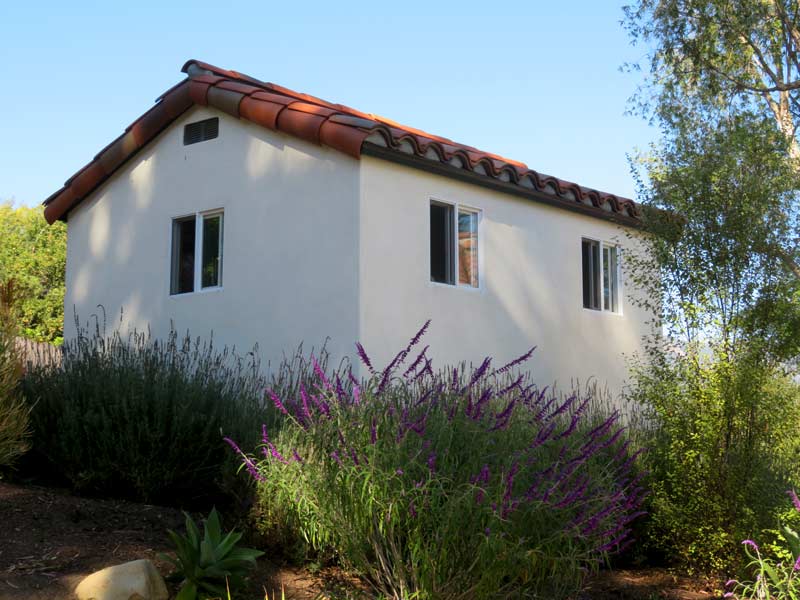
AFTER PHOTO: Here is the finished shed after the third (finish)coat of integral color plaster was applied (and landscaping had filled in).
Santa Barbara Spanish exterior Stucco Color Recommendations
To achieve a classic Santa Barbara Spanish stucco exterior, you must start with the right color and high quality materials. To achieve the look with an integral plaster color, I recommend the LaHabra brand stucco materials (BELOW).

On November 20, 2021 I shot this photo of the stucco color and supplies as they arrived on site for the main house. Later, we would use the same setup for the Spanish shed plaster work.
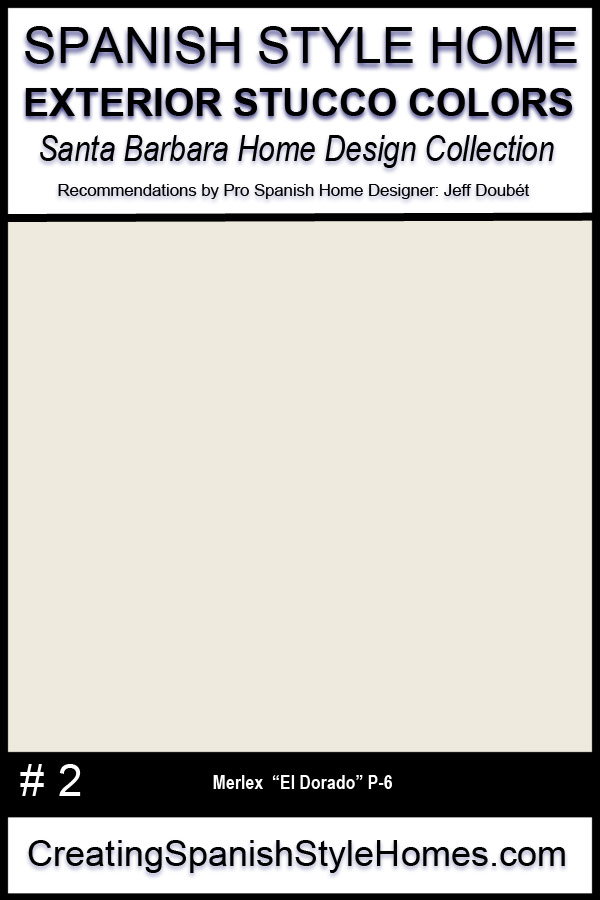
For both projects, we used: LaHabra Color “El Dorado” (MERLEX P-6) with LaHabra Santa Barbara Mission Finish (Base 100). In my opinion, El Dorado is a very nice off white stucco color, perfect for a Santa Barbara Spanish project.
PLEASE NOTE: I always recommend that clients pay their stucco team to create large sample(s) of the integral color plaster they are considering. Purchase and apply the colored stucco to a 3′ x 5′ cement board or HardiBacker board .
This oversized sample will provide you an actual, real material sample you can move around in different areas of your project. It’s important to view your color choice at various times of the day.
How to Upgrade the Approach to a Quality Spanish Shed
The homeowner and their top notch landscape team pulled out all stops and put in a high quality concrete walkway and 3 steps up to the shed.
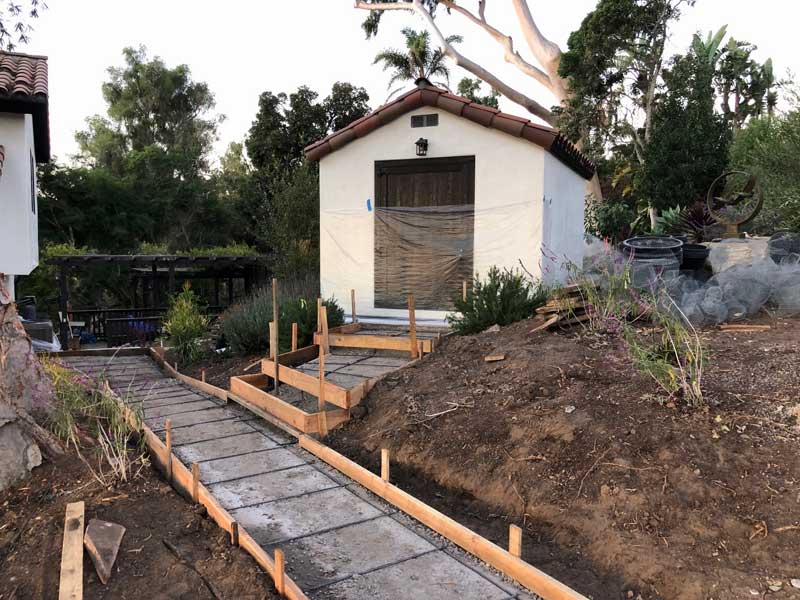
By November 29, 2023 the team was setting their wood forms and rebar over the top of compacted road base, in prep for colored concrete. Note the trenches in the slope above. They are also getting ready to hand stack their Santa Barbara sandstone garden walls.
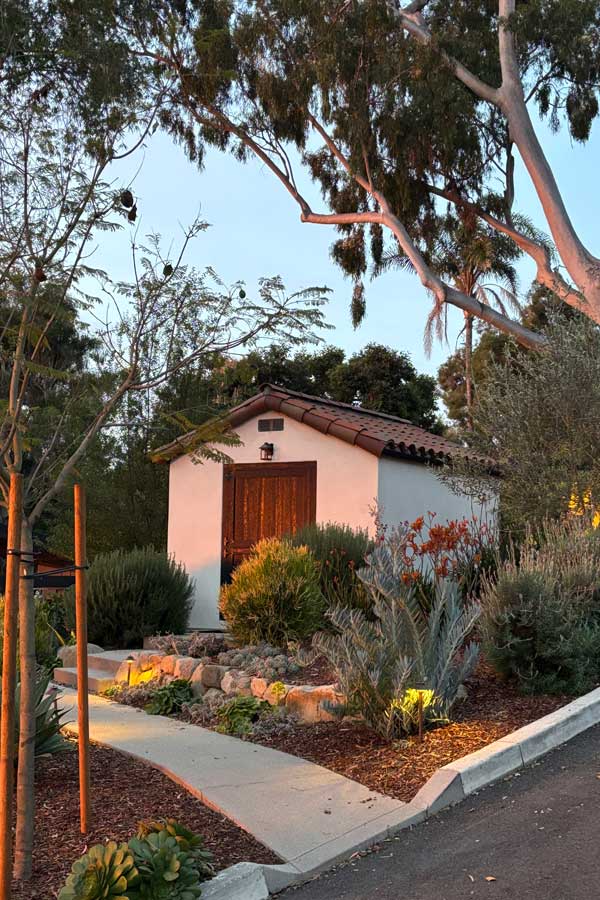
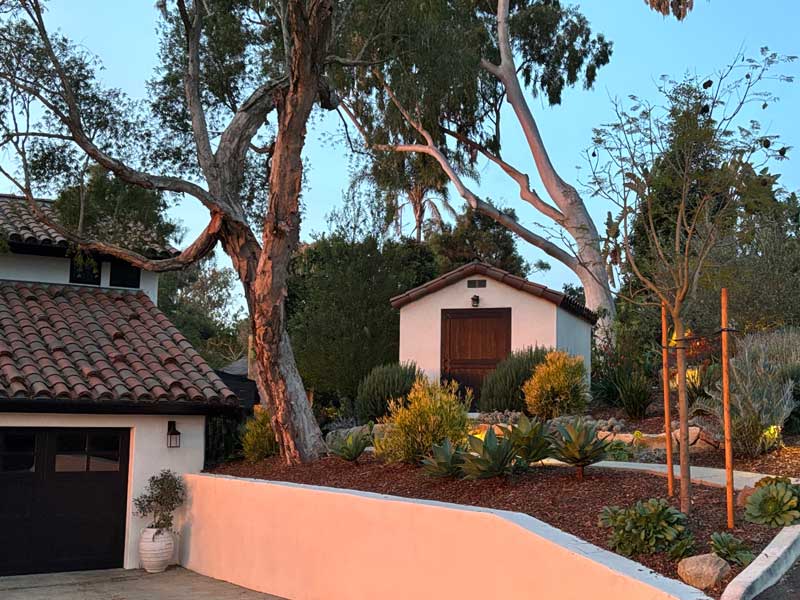
AFTER PHOTO: A little over 2 years has passed since the shed and landscape were completed. Note how the concrete pathways and steps have a subtle, earthy color that compliments the hand stacked sandstone garden walls.
The integral color is mixed directly into the concrete before it is poured. To learn more about the technique, check out this independent, local Santa Barbaran explaining the process.
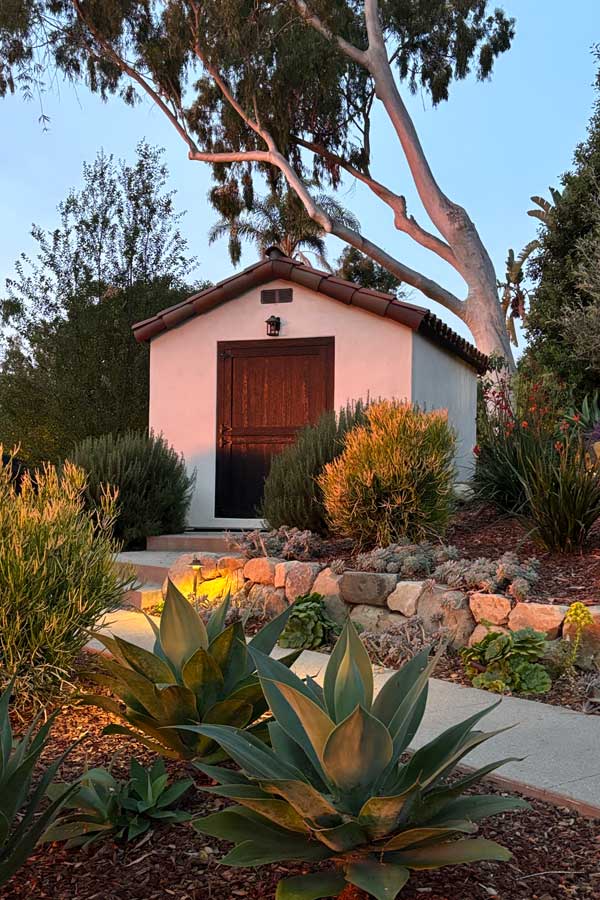
Beautiful Agaves and other succulent plants add texture to the Spanish shed scene, as do the expertly handcrafted Santa Barbara sandstone garden walls.
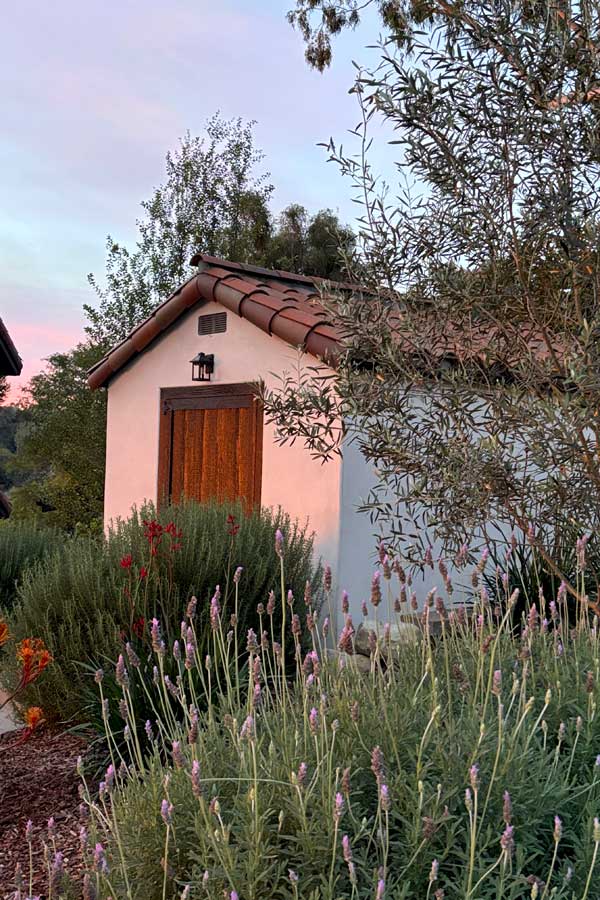
Imagine walking to your Spanish garden shed after you accomplish your dream.
I captured these shots (February 9, 2026) while I was jogging past the project. Something I do almost every day. But on this early morning, the sun was coming up after a recent storm. The warm glow of the sunrise was warming the stucco walls in a beautiful way.
As an aside: LaHabra Color ” El Dorado” is a soft white, perfect for our Santa Barbara Spanish home neighborhoods. Scroll up to see actual color sample.
My point is that El Dorado is more “white” than these early a.m. photos depict:)
Well, I hope you enjoyed another Spanish shed project in Santa Barbara. I have more of them to share with you in the future!
If you are a local Santa Barbara or Montecito property owner and would like to discuss your own custom shed project, (and a wide range of trades I can introduce you to), please check out my design consulting services page.
In the meantime, Thank you for stopping by… and Good Luck with your project!